Monday, December 31, 2012

Pineapple Cake - How to make Pineapple Pastry


Pineapple Cake - It is one of my favorite cake and most of the occasions i try this pastry whenever i visit any bakery. So why not i should try this at home for a special occasion on my husbands birthday.


How to make Pineapple Cake in Home


Ingredients:

For Baking:
1. All purpose flour (or Maida)- 1 and 1/2 cups
2. Eggs - 2
3. Butter - 1/2 cup
4. Sugar - 1 cup
5. Milk - 1/2 cup
6. Baking powder - 1 and 1/2 tsp
7. Vanilla Extract - 2 tsps
8. Oil - 1/2 cup

For Icing:

1. Sugar - 2 cups
2. Unsalted Melted Butter - 1/2 cup
3. Pineapple Juice - 1/2 cup
4. Pineapple pieces - 1/2 cup
5. Green colour - little

Procedure:

1. We need to make 3 mixs.
2. First, Mix wet ingredients such as, in one bowl beat eggs, add vanilla extract to it.
3. Second, in other bowl whisk butter and sugar properly.
4. Third, Mix dry ingredients such as, in another bowl sieve flour, add baking powder 
5. Now mix all these 3 mixs together as below.
6. Sift the flour carefully into bowl of sugar and butter mix and whisk properly. Meanwhile add egg mix and milk to this. Now our batter is ready.
7. Grease a pan or steel bowl preferrably round in shape, using oil or butter.
8. After greasing the pan, sprinkle some flour (any) on the greased tin and pat along sides and bottom and remove the excess flour which oozes out after sticking to the greased pan. And pour the batter in this bowl.
9. place it in the oven which is pre-heated to 350 degrees F(175 degrees C) and then bake for about 30 to 40 minutes.
10. In the absence of oven you can bake the cake in normal pressure cooker as well. 
11. For this, pour water upto 1 inch high in a pressure cooker which is of 3 litre and above capacity.
12. Now place a stand in the water and then place our pan with cake batter on this stand.
13. Close the cooker with lid. 
14. Do not put whistle.
15. Steam for 30 minutes on a medium flame.
16. After 30 minutes, open lid and allow steam to escape.
17. Now heat without lid for another 5 minutes. Take out and cool completely.

18. As baking the cake is finished, we proceed towards icing it.

19. Grind sugar to a very fine powder.
20. Using electric whisk or normal wire whisk, mix powdered sugar and butter untill peaks appear.
21. Cut the cake into 2 horizontal equal halves.
22. Wet both the layers using pineapple juice.
23. Now apply icing on both the layers.
24. Spread pineapple pieces completely on one layer.
25. Place 2nd layer on top of this.
26. Also ice along the sides of the cake.
27. Now add green colour to the icing and write some msg on the cake.
28. If preferred can ice by drawing roses etc on the cake.
29. I garnished the cake along its sides and on one side of the top using pineapple pieces.
30. During whisking the icing, I added some pineapple juice to it to give pineapple flavour to the icing.


Sending this recipe to: 

Chicken 65 Dry recipe - How to make Chiken 65 Cripsy and Crunchy


Chicken 65  - Do you know how to make Chicken 65 Dry, Cripsy and Crunchy. Lets get started into making of hot and crunchy spicy chicken Starter.

How to make Chiken 65 Cripsy and Crunchy

Recipe Reference : Sharmis Passions

I usually go thru sharmee's blog and this particular recipe of Sharmis Passions tempted me a lot for making chicken 65 and here is my version with few changes.
The changes were only as I didn't had few ingredients readily available in my pantry and my version too tasted well :).

Ingredients:


1. Oil - For deep frying2. Curry Leaves - Few
3. Green Chilies - 2 (halved)
4. Raw onion slices - Few just to season
5. Lemon - 1/2 wedge just to season (I garnished with chopped coriander :))


For Marination:
1. Cleaned Boneless Chicken - 1/2 kg (I used with bones :p)
2. Ginger Garlic Paste - 1 tsp
3. Coriander Powder - 2 tsp
4. Red Chili Powder - 3 tsp
5. Pepper Powder - 1/4 tsp
6. Cumin Powder - 1/4 tsp
7. Turmeric powder- a generous pinch
8. Corn Flour - 2 tsp
9. Rice Flour - 3/4 tsp
10. Red Food Color - 1/4 tsp (I didn't use)
11. Lemon Juice - 1 tbsp (I used 3 spoons of curd instead)
12. Egg - 1
13. Salt - To taste

Procedure:


1. Mix all the ingredients listed under 'For Marination' and mix well.

2. Allow it to rest for 2 hours atleast - the more resting time the softer the chicken 65 will be. 


3. Then heat oil in a kadai deep fry curry leaves and green chillies till crisp and set aside. 


4. Then add the chicken pieces in batches and fry well.


5. Deep fry them until crispy and till it turns golden brown. Garnish with fried curry leaves and green chillies, Onion slices and chopped coriander.


Note:

1. The time for marinade is very important to get juicy soft chicken 65 else it would turn hard and rubbery. So make sure to marinade atleast for 2 hours atleast.
2. Choose tender chicken thigh part and cut them into small bite sized pieces.
3. It is a better snack item.


Medu Vada - How to make Medhu Vadai Recipe


Medu Vada or Urad Dal vada is a very easy breakfast item as very few ingredients go into its making. It really tastes well when we add onions and coconut.


How to make Medhu Vadai Recipe


This as a perfect combo with idli especially found in south indian hotels.


Ingredients:

1. Urad Dal - 2 cups
2. Curry Leaves - 10 to 12 (finely chopped)
3. Coconut - 2 tbsps (finely chopped not grated)(But I used grated dry coconut powder since I didn't had fresh coconut readily available at that particular moment)
4. Black Peppercorns - 1 tsp (Crushed)
5. Cumin seeds - 1 tsp
6. Salt - To taste
7. Green Chillies - 2 to 3 (very finely chopped)
8. Oil - For deep frying
9. Cooking soda - 1/4 tsp (Optional)
10. Onion - 1 small (finely chopped..optional as the traditional medu vada procedure doesnot contain onion)

Procedure:


1. Soak urad dal for 4 to 6 hrs or overnight.

2. Then grind coarsely. 


3. Do not add much water, add just to form a thick paste. 

4. Heat oil for deep frying in a kadai.
5. Meanwhile mix all the above ingredients in the batter except oil :).

6. The only spices used are pepper and cumin seeds.


7. Wet your hand everytime before dropping vadas so that you can easily drop vadas into oil.

8. Now take small lemon-sized batter, flatten and press with your thumb in its middle so that to make a hole. 

9. Now carefully drop this dumpling in hot oil. Like wise drop 5 to 6 vadas per batch in the hot oil and fry well till the ssshhh sound subsides.


10. Likewise make all the vadas, enjoy hot vadas delicacy with peanut chutney or ginger chutney and sambar :).


Note:

1. Grind only before making vadas. So that the batter will be fresh and perfectly moist. 
2. Perfect batter consistency can be checked as, after grinding take a bowl of water and drop some batter by making it in the shape of a ball in the water. If the batter ball floats on the water then its perfect consistency. Else if it sinks down or if the batter ball splits and batter flows on the water then its said to be wrong consistency. Which indicates batter consists lot of water and with such batter we cannot make proper vadas.
3. Beating the batter for almost 4 to 5 minutes before making each batch of vadas helps in getting soft and fluffy vadas.
4. Wet hands for each dumpling.
5. Frying in a medium or preferrably low flame helps vadas evenly cooked in the middle also it takes a bit longer time to get the brown colour.
6. Flattening vada batter using hands is preferred than using any plastic cover. Using cover flattens the vadas after frying unlike using hands with which we can get fluffy vadas.


Tindora - Dondakaya Masala curry - How to make Ivy Gourd gravy recipe


Tindora or Dondakaya Masala curry, Its english name is Ivy gourd people usually make only fry version of this. But its gravy version also tastes better and here it is for you.
Tindora recipe - How to make Ivy Gourd gravy recipe


Ingredients:

1. Tindora (Dondakaya/Ivy Gourd) – 500gms
2. Mustard seeds - 1/2 tsp
3. Cumin seeds - 1/2 tsp
4. Curry leaves - a spoonful
5. Red chilli powder – 3 tsps
6. Turmeric powder - 1/2 tsp
7. Dhaniya powder – 1 tsp
8. Garam Masala – 1 tsp
9. Salt - To taste
10. Oil - As required
11. Water - 2 cups

To Grind:

1. Coriander seeds - 1 tsp
2. Garlic cloves – 3
3. Green Chillies – 3
4. Pea nuts – 10
5. Cashew nuts – 10
6. Onion – 1 
7. Tomatoes – 2 
8. Ginger paste – 1 tbsp


Procedure:

1. Cut Tindora into long pieces and keep aside.

Masala Preparation:
2. Heat a kadai and add 1/2 tbsp of oil.
3. Once the pan starts smoking, add coriander seeds, Garlic cloves, Green chillies, Peanuts and Cashew nuts. Finely fry them. 
4. Add chopped onion and fry them until they turn transparent. 
5. Now add ginger paste, mix well and after a while, add chopped tomatoes and add salt as required for this masala.

6. When tomatoes become tender,  remove the pan from flame. 7. Let it cool down completely and grind the mixture. Keep the masala paste aside.


Gravy Preparation:

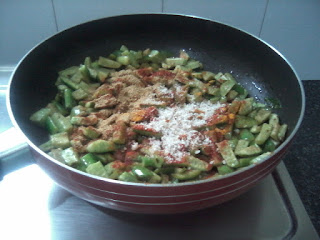
1. Heat oil in a pan again. Add mustard and cumin seeds and once they start popping out, add curry leaves and Tindora slices, and sprinkle sufficient salt for the slices. Let them fry and become tender. It takes a bit longer time.

2. Now, add Red chilli powder, Dhaniya powder, Garam masala and a pinch of turmeric. Mix the content well enough and close the lid.


3. Let it cook for 3 min and then add the masala paste and pour water. Check salt, mix well and close the lid again. Cook for 5 min and remove from the flame.


4. Garnish the gravy with coriander leaves. Serve hot with White Rice/Rotis. Tastes better with rotis than rice.


Note:

1. First saute ivy guard pieces. During its frying, you can carry on with masala preparation.
2. As soon as you add the masala paste into ivyguard curry, the paste starts thickening. So you need to add it at the end.
3. Also if you add much water it takes a bit longer time to thicken and in due course ivy guard slices absorb the masala paste and hence become tasty.
4. If you temper the masala paste with a spoon of oil, mustard and cumin seeds, pinch of turmeric powder and with few curry leaves it makes cashew-tomato chutney which suits better for dosas :).

Sending this recipe to:


Wednesday, December 26, 2012

Christmas Plum Cake Recipe - Fruits and Nuts Cake Recipe


Plum cake is usually made during Christmas, also called as Fruit and Nut cake as fruits and nuts being the show stoppers. Dry fruits and nuts should be in equal proportion, a spoonful of spice mix(Garam Masala powder including powders of cloves, cardamom, cinnamon and nut meg etc) and little quantity of Rum. 


Christmas Plum Cake Recipe

Dry Fruits and Nuts are soaked in rum a month before christmas and are used while baking the cake. But in my recipe I omit Rum and spice mix part even :). Caramelised sugar syrup is also used.

Ingredients for Christmas Plum Cake Recipe


For Baking:

1. Cooker cake mix - 175gms (This time I used the cooker cake mix instead of preparing the cake batter myself)
2. Oil - 1 tbsp
3. Milk - 2/3 cup
4. Caramelised sugar syrup : Heat 2 cups of sugar in a pan and when it turns brown add 1/3 cup of water
5. Dry Fruits - Am adding Raisins, Dates, Tuti Fruti, Anjeer(Figs)

For Frying:


6. Nuts - Chopped Almonds, Cashews
7. Butter - 2 tsps

In Plum Cakes, Rum is used but I omit it in my recipe.


Procedure - How to make Christmas Plum Cake Recipe


Frying:
1. Heat 2 spoons of butter in a pan and fry chopped nuts mean while boil chopped dry fruits in a cup of water till they become soft. (It just takes 2 to 3 minutes for the dry fruits to become soft and tender in the hot water).
Ingredients for Fruits and Nuts Cake


Baking:

2. Drain off fruits (Collect the drained water in a bowl and add this water during mixing the cake batter) and coat boiled fruits and fried nuts with cake mix. This helps them not to settle down the cake after baking.

 Then to the cake mix add these fried nuts and boiled dry fruits, caramelised sugar syrup, drained water, milk and oil and bake the cake in normal pressure cooker.


3. Grease a pan or steel bowl using oil or butter.

4. Now sprinkle some flour(any usually all-purpose or maida flour) on the greased tin and pat along sides and bottom and remove the excess flour which oozes out after sticking to the greased pan. 
5. Now pour water upto 1 inch high in a pressure cooker which is of 3 litre and above capacity.
6. Now place a stand in the water and then place our pan with cake batter on this stand.

7. Close the cooker with lid. 

8. Do not put whistle.
9. Steam for 50 to 60 minutes on a medium flame. Bcoz this cake contains fruits and nuts it takes a bit longer time.

10. After 60 minutes, open lid and allow steam to escape.

11. Now heat without lid for another 5 minutes. Take out, cool for an hour, cut and serve.
12. Usually plum cakes are eaten directly without any icing.

 Fruits and Nuts Cake Recipe is ready to serve.

Fruits and Nuts Cake Recipe

Christmas Plum Cake Recipe

My Baking Essentials | A Christmas Gift


When I was a beginner to foodie blogs and especially the baking part, I saw a post in a foodie blog and got fascinated by seeing those baking essentials like Measuring Cups and Spoons, Cookie Tray, Baking Tins with different shapes such as Floral and Bundt pans, Muffin Moulds, colourful Ramekins, Cookie Cutters etc.
Baking Essentials - When I got some confidence after checking out my baking skills, I thought of buying baking essentials. It was a hard task to find a shop where I can buy baking accessories. I enquired in lot many shops and bakeries regarding baking accessories. On a christmas day my hubby succeeded in finding out the shop and here is my Christmas gift :).

Piping Bag and Nozzles:  


Baking Essentials


Hyacinth Beans Stir Fry / Sondel


Hyacinth Beans Stir Fry or Sondel - In my previous post I described kudumulu using hyacinth beans which is a winter baby. Now I describe another recipe using hyacinth beans named Hyacinth Beans Stir Fry. This suits better either as a curry or as a snack.


How to make Hyacinth Beans recipe

Hyacinth Beans------> Also called as "Anapa Kaaya" or "Anumulu" in Telugu .


Ingredients:
1. Hyacinth Beans - 2 cups
2. Mustard Seeds - 1 tsp
3. Cumin Seeds - 1 tsp
4. Green Chillies - 4 nos
5. Onion - 1 large
6. Curry Leaves - 2 stems
7. Spring Onion Leaves - 2 leaves
8. Coriander - 1/2 of a small bunch 
9. Salt - To taste
10. Turmeric Powder - 1/4 tsp
11. Red Chilli Powder - 1 tsp
12. Chat Masala - 1/4 tsp (optional)
13. Lemon Juice - 1 tsp
14. Oil - 2 tsps

Procedure:

1. Pressure cook hyacinth beans by adding some salt and upto 2 whistles and drain off remaining water. 
2. Heat oil in a kadai, add mustard and cumin seeds. Once they spitter add chopped green chillies, onions, curry leaves, spring onion leaves and toss well.
3. Add boiled hyacinth beans, turmeric powder, salt, red chilli powder and toss well.
4. Once it gets cooked add chat masala, switch off the flame and dish out to a serving bowl.
5. Add lemon juice and garnish with chopped coriander leaves. Hyacinth Beans Stir Fry is ready to serve.


Kudumulu


Kudumulu is made using hyacinth beans. These beans are usually available during winters. It is a very nutritious and healthy breakfast recipe or any past-time snack. The procedure is also very simple and easy as very less items go into its making

 Kudumulu


Hyacinth Beans------> Also called as "Anapa Kaaya" or Anumulu in Telugu .

Ingredients:


1. Rice Flour - 2 cups
2. Hyacinth Beans - 2 cups
3. Green Chillies - 5 nos
4. Spring Onion Leaves - 1 cup (Chopped)
5. Coriander - 1 cup (Chopped)
6. Salt - To taste
7. Oil - To taste

Procedure:


1. Pressure cook hyacinth beans by adding some salt and upto 2 whistles and drain off remaining water. 
2. Grind green chillies by adding little salt to a thick paste.

3. Now take rice flour in a bowl and add these boiled beans to it.

4. Also add chilli paste, chopped corriander, spring onion leaves and some more salt. And mix well using little water.


5. Roll dough to small balls. 
6. Take each ball, flatten it and press in the middle so that it takes the shape of a kudumu as shown below.

7. Likewise prepare kudumulu from the entire dough and keep them aside.

8. Now pour a glass of water in a pressure cooker, place idli stand and arrange all these kudumulu on that stand as a heap.
9. Pour 2 tbsps of oil on these kudumulu from top to bottom of the heap and in each kudumu so that they might not stick to each other after boiling.

10. Now close the lid and do not put whistle. Steam for almost 20 minutes.

11. Once you switch off the flame, open the lid after 5 minutes and take out each kudumu carefully into the serving plate as they will be very hot.


Serving Suggestion:

1. Commonly parathas are served with curd or mint chutney, any snack item with tomato sauce etc. Unlikely, Kudumulu are served with oil :). Dip a piece of kudumu in oil and enjoy its delicacy. As too much oil intake is not preferrable, you can enjoy kudumulu directly without dipping in oil.

Note:

1. Prepare kudumulu in a medium size, if you make them thicker then, it takes a longer time to get cooked properly and will be hard while eating. Also, if you make them thinner then, they might break while preparing or even after steaming.

2. I feel the taste of kudumulu lies in spring onion leaves also. So don't hesitate to add them and hence the green colour too. 


Sending this recipe to: 


Linking my recipe to : Sumee's Culinary Bites